A heavy luxury chandelier can transform a room, but its beauty depends on secure support above the ceiling. How to install heavy luxury chandeliers safely begins with one practical question: can the structure carry the fixture’s full weight? Electrical educator Mike Holt is a useful reference for understanding electrical safety. A guiding rule for this article is: “Support the weight before you connect the wires.” This is an editorial safety principle, not a direct quotation from Holt.
Look beyond the decorative canopy. A plaster ceiling, a loose junction box, or an undersized mounting bracket may conceal a serious weakness. Check the fixture’s listed weight, the ceiling support, and the manufacturer’s installation instructions before work begins. Turn off the circuit at the breaker, then verify that power is off with a suitable tester. Never rely on the wall switch alone. It can be misleading.
Large chandeliers are awkward to lift and easy to damage. Use stable access equipment, a helper, and hardware rated for the fixture and ceiling structure. If the support is uncertain, stop. A licensed electrician or qualified installer should inspect it. That may feel cautious, even inconvenient. Still, guessing about a hidden beam is not a sound installation plan. This guide will explain the checks, tools, and decisions that help protect both the fixture and everyone beneath it. Safety first. Artistry comes after.
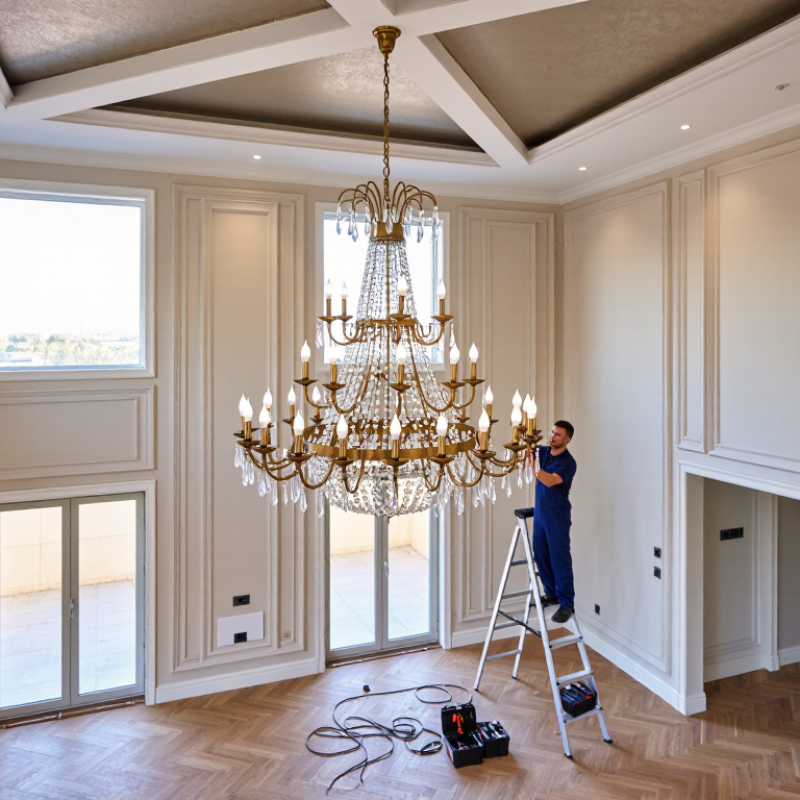
A safe installation starts with the chandelier’s actual weight, including bulbs, shades, and any hanging hardware. Check the manufacturer’s specifications rather than estimating from appearance. A large fixture can place substantial, sustained load on the ceiling. Not the drywall. Locate the framing and confirm that the mounting point connects to a joist or properly installed structural support. If the ceiling is plaster, remodeled, or difficult to inspect, have a qualified contractor assess it before lifting the fixture. A box intended for a light fixture may not support a heavy chandelier.
Electrical planning matters just as much. Confirm that the circuit is switched off at the breaker, then verify it with a suitable voltage tester; a wall switch alone is not proof. Check that the wiring, grounding, and ceiling box are suitable for the fixture and local conditions. Older wiring or brittle insulation calls for an electrician, not a workaround. Plan how the chandelier will be held while connections are made—an assistant or rated lifting support can prevent strain and damage. Measure the finished hanging height, too. A careful measurement can still miss a sloped ceiling or a door swing; pause and recheck before tightening the final connections.
| Assessment Area | What to Check | Practical Guidance | Safety Decision |
|---|---|---|---|
| Fixture weight | Find the chandelier’s listed weight, including its canopy, chain or rod, and any accessories supported by the ceiling connection. | Use the manufacturer’s stated installed weight. Do not estimate from appearance or rely on the weight rating of an unrelated electrical box. | Confirm that the complete support assembly is listed or otherwise approved for the fixture’s weight. |
| Up to 50 lb (22.7 kg) | Check the ceiling outlet box, mounting bracket, fasteners, and their markings or documentation. | A standard-looking box is not proof of adequate capacity. Use only a box and mounting system specifically rated for the actual load and installed as directed. | Do not attach the fixture to drywall, plaster, or an unrated box alone. |
| More than 50 lb (22.7 kg) | Check the structural support and the complete load path from the fixture to the building framing. | In the United States, NEC 314.27(A) addresses outlet boxes supporting luminaires weighing more than 50 lb. Applicable code editions and local requirements may vary. | Use a support system designed and installed for the fixture’s weight; have a qualified electrician or building professional assess uncertain framing. |
| Ceiling joists | Identify the joist type, location, condition, and direction before selecting attachment points. | Secure the approved support to suitable structural framing using the specified fasteners. Avoid damaged framing and do not cut or notch engineered members without professional approval. | If the fixture does not align with suitable framing, use an appropriately rated structural support—not drywall anchors. |
| Trusses or engineered framing | Determine whether the ceiling uses roof trusses or other engineered structural components. | Do not drill, cut, or modify a truss unless the truss designer or a qualified building professional approves the change. | Have the support method reviewed when the load, attachment location, or framing capacity is uncertain. |
| Concrete or masonry ceiling | Identify the base material, its condition, and the anchor type and capacity required for the installation. | Use anchors specifically suitable for the substrate and load, installed according to their listing and instructions. Check for concealed services before drilling. | Get professional guidance if the concrete condition, anchor capacity, or hidden-service location is unknown. |
| Electrical box and support | Verify the box and bracket are suitable for both the fixture and the wiring arrangement. | Follow the fixture and box instructions. A box’s physical size or presence does not establish its load rating. | Replace an unsuitable or damaged box with a correctly rated assembly before hanging the chandelier. |
| Electrical supply | Check the fixture’s voltage, frequency, lamp type, total wattage, and any driver or dimmer requirements against the supply and controls. | Follow the fixture’s electrical label and installation instructions. Do not exceed the marked maximum lamp wattage or use incompatible dimming equipment. | Ask a qualified electrician to assess uncertain wiring, circuit capacity, or control compatibility. |
| Grounding and connections | Confirm that the fixture’s grounding conductor and supply conductors can be connected correctly. | Make connections in an appropriate electrical enclosure using approved connectors and the instructions supplied with the fixture. | Do not energize a fixture with missing, damaged, or uncertain grounding or wiring connections. |
| Safe isolation | Identify the correct circuit and confirm that power is off at the work location. | Switch off the breaker and verify the absence of voltage with an appropriate tester before handling conductors. A wall switch alone is not reliable isolation. | If the circuit cannot be positively identified or verified, stop and contact a qualified electrician. |
| Installation and lifting | Plan access, lifting equipment, temporary support, and the number of people required for the fixture’s size and weight. | Support the chandelier independently while making connections; do not let wiring carry its weight. Follow the manufacturer’s assembly and hanging instructions. | Use professional installation for fixtures that are too heavy, large, or awkward to handle safely. |
| Final inspection | Check the attachment, canopy, connections, clearances, and operation before returning the circuit to service. | Confirm that the fixture is stable, the wiring is enclosed, and all parts are secured as instructed. Follow local electrical and building codes. | Do not use the fixture if it shifts, the support is uncertain, or wiring or connections show damage. |
Its weight must transfer to sound ceiling framing, not just plaster or drywall. Never guess.
Compare the chandelier’s full weight, including crystals and canopy, with the support’s stated load rating. Ratings are not interchangeable.
Only if it is specifically rated for the fixture’s weight and mounting method. A sturdy appearance proves little.
Do not assume it is adequate. Ask a qualified electrician or structural professional to inspect uncertain or damaged framing.
Use a stable platform or lifting device rated above the fixture’s weight. Check straps and locking parts, and keep the load balanced.
A helper can steady the chandelier while it is fastened. They should not stand beneath it.
Move furniture, cover fragile surfaces, and keep people and pets outside the area beneath the fixture. Secure your platform on level flooring.
Switch off the correct breaker and test the circuit with a properly rated tester. A label alone is not proof.
Stop and reassess the support, framing, and wiring. I still find this easy to underestimate. Call a qualified professional if anything feels uncertain.
This guide explains how to install heavy luxury chandeliers safely, beginning with a careful assessment of the fixture’s weight, the ceiling structure, and the electrical requirements. Before work starts, choose mounting supports and hardware rated for the combined load, and plan suitable lifting equipment to control the chandelier without putting people or the fixture at risk. Clear and secure the work area, switch off the relevant electrical supply, and verify that power is disconnected before handling wiring.
Next, install reinforced ceiling support that transfers the chandelier’s weight to an appropriate structural member, then attach and raise the fixture according to its installation instructions. Make electrical connections carefully, keeping wires secure and properly contained. Before restoring power, check that the chandelier is firmly mounted, balanced, and free of loose parts. If the ceiling structure, wiring, or lifting process is uncertain, consult a qualified professional. Periodic checks of the mounting and connections can help maintain safe operation over time.

 Sienna Lights